Overview of the Recipe
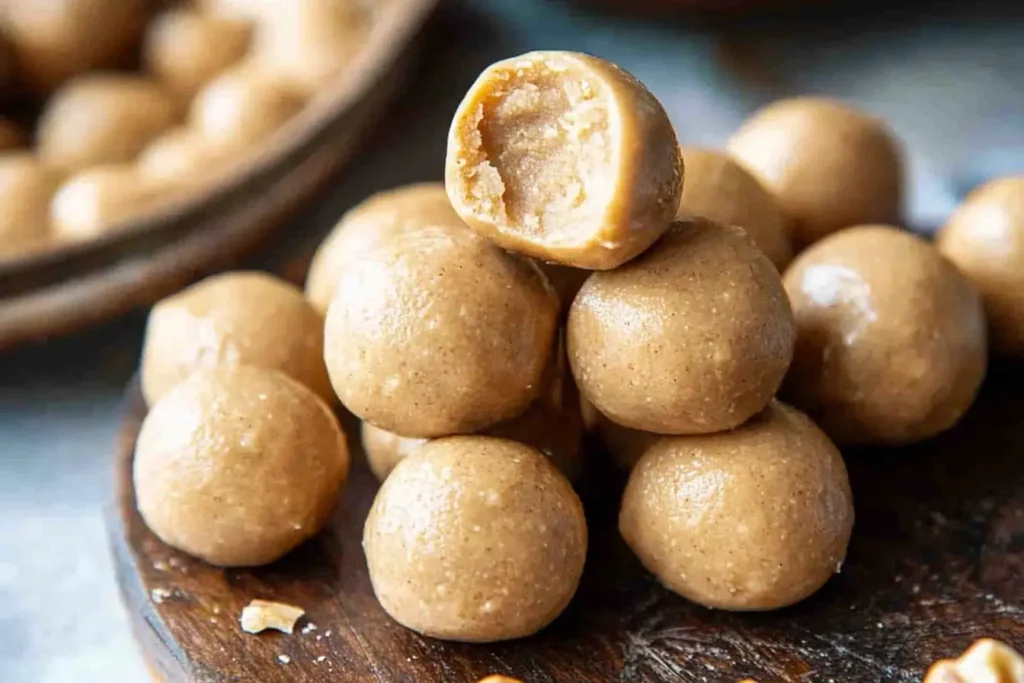
Peanut butter balls with Rice Krispies are a delicious, no-bake treat that’s incredibly easy to make. Whether you’re a beginner in the kitchen or a seasoned cook, this recipe provides a hassle-free way to whip up a satisfying snack or dessert. With only three simple ingredients—peanut butter, Rice Krispies cereal, and a sweetener or coating like chocolate—this recipe eliminates any complex steps while delivering rich, crispy, and flavorful bites.
The simplicity and versatility of peanut butter balls make them a popular choice for families, busy individuals, and even fitness enthusiasts looking for quick energy. They’re ideal for holidays, gatherings, or as an everyday treat. By using common pantry staples, you can create a crowd-pleaser without needing fancy equipment or specialty ingredients.

Moreover, this recipe allows for several customizations and dietary modifications. Whether you prefer gluten-free, vegan, or low-sugar options, peanut butter balls can cater to a variety of preferences. Let’s dive into the details, including ingredients, preparation tips, and storage solutions, to help you create the perfect batch.
Introduction to 3-Ingredient Peanut Butter Balls
Why This Recipe Is Popular and Beginner-Friendly
Peanut butter balls are a beginner’s dream recipe because they require minimal effort and yield excellent results every time. You don’t need to bake, mix complex ingredients, or spend hours in the kitchen. The step-by-step process is straightforward, making it perfect for kids to help with, too.
These peanut butter balls offer several benefits, such as:
- Minimal Ingredients – Only three main components: peanut butter, Rice Krispies, and sweetener or coating.
- Quick Prep Time – The entire process takes no more than 20–30 minutes.
- No-Bake Process – No oven or stove is required, keeping the preparation simple.
Peanut Butter
Peanut butter is the key ingredient that binds these balls together while adding a rich, nutty flavor. You can choose between creamy and crunchy peanut butter depending on your texture preference:
- Creamy Peanut Butter – Provides a smoother consistency and blends well with Rice Krispies.
- Crunchy Peanut Butter – Adds extra texture and nutty bits for a satisfying crunch.
For dietary preferences, you can also use substitutes like almond butter, cashew butter, or sunflower butter. These alternatives work just as well while offering a unique flavor twist.
Rice Krispies
Rice Krispies cereal adds a light and crispy texture that balances the creaminess of peanut butter. When selecting the cereal, ensure it is fresh and free from moisture to maintain the desired crunch. For variation, you can use other cereals like cornflakes or puffed rice.
Sweetener (Chocolate or Other Coating)
The sweetener or coating brings the recipe together by adding a hint of sweetness. Common options include:
- Types of Chocolate: Milk, dark, or white chocolate can be melted and used as a coating. Dark chocolate is popular for its slightly bitter taste, which pairs perfectly with peanut butter.
- Optional Sweeteners: Honey, maple syrup, or agave can be used to bind the mixture while providing natural sweetness. These options work well for a no-chocolate version.
Ingredients Overview
To make these delicious 3-ingredient peanut butter balls with Rice Krispies, understanding each component and how to prepare them is essential for a perfect result. Below is a breakdown of the ingredients and preparation tips to ensure consistency and flavor.
Preparing the Ingredients
Before you begin, ensure all the ingredients are measured correctly and at room temperature. This makes mixing easier and creates a smoother consistency.
- Peanut Butter:
- Measure the peanut butter using a spoon or measuring cup to get the exact amount.
- If the peanut butter is too thick, slightly warm it in the microwave for 10–15 seconds to make it more pliable.
- Rice Krispies Cereal:
- Measure the cereal in a clean, dry cup to avoid clumping or crushing.
- For added texture, mix the Rice Krispies gently to prevent breakage.
- Sweetener or Chocolate Coating:
- If using melted chocolate, ensure it is melted slowly and evenly using a double boiler or microwave. Stir frequently to avoid burning.
- Optional sweeteners like honey or maple syrup should be measured accurately for the perfect balance.
Mixing the Ingredients
- In a large bowl, combine the peanut butter and Rice Krispies. Mix thoroughly until the cereal is evenly coated with peanut butter.
- If the mixture appears dry, add a small amount of extra peanut butter or sweetener to bind it together.
- Adjust the texture: The mixture should be sticky but not overly runny or dry. Aim for a consistency that’s easy to roll into balls.
Step-by-Step Guide to Making Peanut Butter Balls
This step-by-step guide ensures you achieve perfect peanut butter balls every time. By following these instructions, you’ll create a balanced, tasty treat that’s both visually appealing and satisfying.
Forming the Balls
- Use your hands or a spoon to scoop a small portion of the mixture (approximately 1 tablespoon).
- Roll the mixture between your palms to form evenly sized balls. Consistency in size ensures even coating later.
- Place the formed balls onto a parchment-lined baking sheet or tray.
Tips for Rolling Perfect Balls:
- If the mixture sticks to your hands, lightly grease your palms with cooking spray or oil.
- Chill the mixture for 10–15 minutes before rolling if it becomes too sticky.
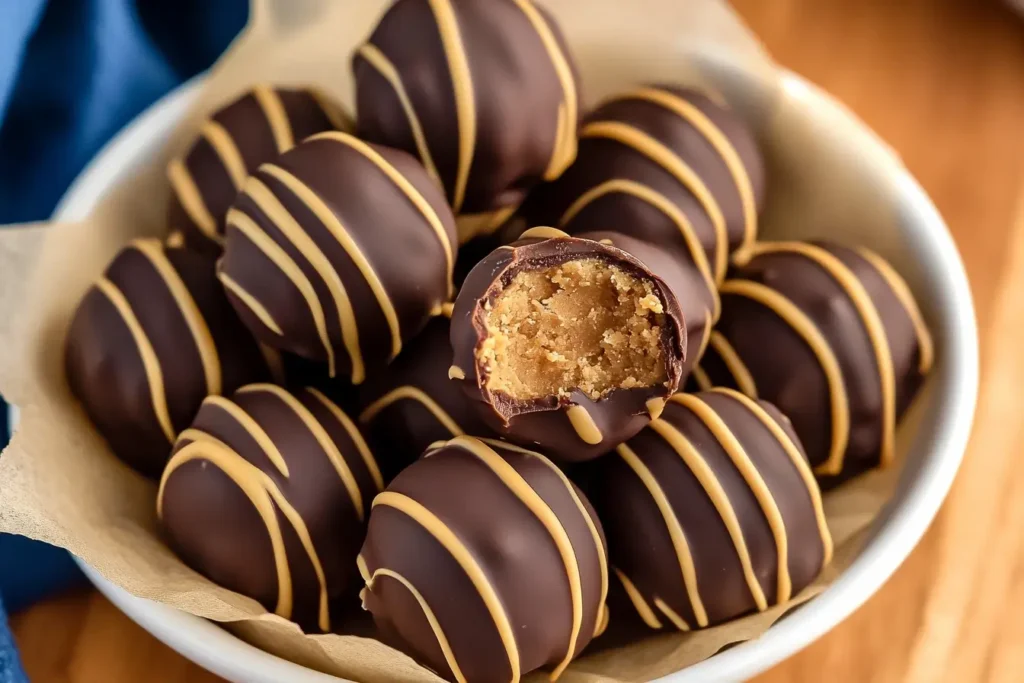
Adding the Chocolate Coating

Adding a chocolate coating enhances the flavor and makes the peanut butter balls look more indulgent. Follow these simple steps to achieve a smooth, even coating:
- Melt the Chocolate:
- Melt the chocolate in a microwave-safe bowl in 15-second increments, stirring between intervals.
- Alternatively, use a double boiler to melt the chocolate gently.
- Dipping the Balls:
- Use a fork or dipping tool to dip each ball into the melted chocolate. Roll it gently to coat the surface evenly.
- Let excess chocolate drip off before placing the ball back on the tray.
- Allow to Set:
- Place the coated peanut butter balls on the parchment-lined tray.
- Allow them to set at room temperature, or chill them in the refrigerator for 10–20 minutes for a firmer coating.
Pro Tip: If the chocolate hardens too quickly, reheat it briefly to maintain a smooth consistency.
Variations and Add-Ons
One of the best things about peanut butter balls with Rice Krispies is their versatility. With just a few tweaks, you can create exciting flavor variations or make them suitable for dietary needs. Below are ideas to customize your peanut butter balls to suit everyone’s taste and lifestyle.

Flavor Variations
Adding different flavors can enhance the richness and depth of the peanut butter balls. Here are some creative ways to experiment:
- Vanilla Extract or Spices: Adding 1 teaspoon of vanilla extract can provide a subtle aroma and flavor boost. For a unique twist, mix in spices like cinnamon, nutmeg, or a pinch of sea salt for a savory-sweet balance.
- Texture Add-Ins: Mix in other cereals, chopped nuts (like almonds or pecans), or dried fruits (raisins, cranberries) for added crunch and complexity.
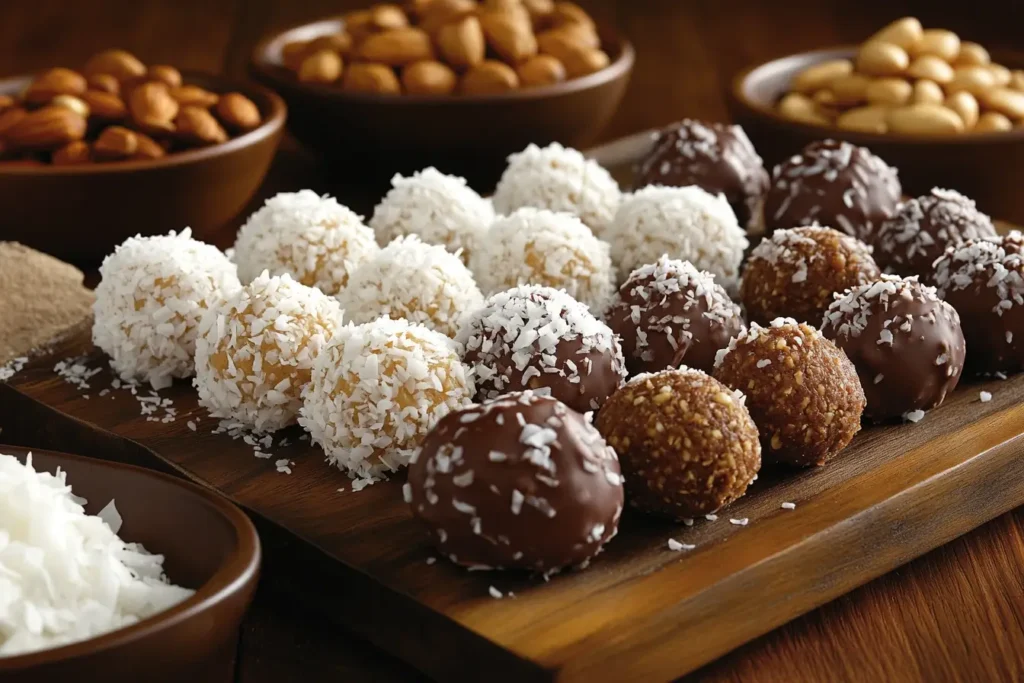
- Coconut Coating: After forming the balls, roll them in shredded coconut for a tropical flavor and beautiful texture.
Dietary Modifications
If you’re following a specific diet, these peanut butter balls are easy to adapt without sacrificing flavor or texture.
- Gluten-Free Options: Rice Krispies are often gluten-free, but always double-check the label. If needed, opt for certified gluten-free puffed rice cereal.
- Vegan-Friendly Substitutes: Use natural peanut butter without honey or any animal-based sweeteners. Replace chocolate with vegan-friendly dark chocolate or dairy-free chocolate chips.
- Low-Sugar or Sugar-Free Options:
- Use sugar-free chocolate or sweeteners like stevia or monk fruit syrup.
- Opt for unsweetened peanut butter and add just a touch of natural sweetener to balance the taste.
These dietary changes ensure that everyone, from kids to adults following restrictive diets, can enjoy this treat guilt-free.
Issues with Mixture Consistency
Sometimes, the peanut butter mixture might feel too dry or sticky. Here are solutions to fix these issues:
- Dry Mixture: If the mixture isn’t sticking together, add a tablespoon of melted peanut butter or honey and mix thoroughly. Adjust slowly until you reach the desired consistency.
- Sticky Mixture: If the mixture is overly sticky and hard to roll, chill it in the refrigerator for 10–15 minutes. This will firm up the peanut butter, making it easier to shape the balls.
Problems with Coating
Coating issues can occur when using chocolate, but with a few tips, you’ll achieve a flawless finish:
- Clumping Chocolate: If your melted chocolate clumps or hardens too quickly, add 1 teaspoon of coconut oil or butter to thin it out.
- Smooth Coating: Dip each ball in chocolate using a fork or toothpick, and tap gently to remove excess chocolate. This prevents thick, uneven layers.
- Quick Hardening: Melt chocolate in small batches to keep it warm and runny throughout the coating process.
Common Mistakes and How to Avoid Them
Making peanut butter balls with Rice Krispies is a straightforward process, but a few common mistakes can impact the final result. Below, we highlight these issues and provide practical tips to ensure success every time.
Preventing Mixture Consistency Problems
- Dry Mixture: If the peanut butter and Rice Krispies mixture becomes too crumbly, it can be difficult to form into smooth balls. This often happens when:
- The peanut butter is too thick or dry. Solution: Use natural peanut butter or add a tablespoon of honey, maple syrup, or a little melted butter to bind the mixture together.
- Too much cereal is added. Solution: Stick to the recommended amount of Rice Krispies for the perfect balance between crunchy and sticky.
- Sticky Mixture: On the other hand, if the mixture is too sticky to handle, it can make rolling the balls a challenge. Solution:
- Chill the mixture for 10–15 minutes before rolling to firm it up.
- Lightly coat your hands with cooking spray or a bit of oil to prevent sticking.
Problems with Chocolate Coating
A smooth and even chocolate coating adds the finishing touch to peanut butter balls, but certain issues can arise:
- Chocolate Clumping or Hardening Too Quickly: This often happens when chocolate is overheated or exposed to moisture. Solution:
- Melt the chocolate in short intervals in the microwave, stirring frequently. Alternatively, use a double boiler for more control.
- Add 1 teaspoon of coconut oil or vegetable shortening to keep the chocolate smooth and glossy.
- Uneven Coating: If the chocolate coating looks lumpy or uneven:
- Use a fork to dip the balls and allow excess chocolate to drip off before setting them on parchment paper.
- Roll the ball gently in the chocolate for even coverage.
- Chocolate Setting Too Slowly: If the chocolate takes too long to firm up, place the coated balls in the refrigerator or freezer for 10–20 minutes. This speeds up the setting process and ensures a clean finish.
Keeping the Chocolate Layer Thin and Smooth
For the best results, aim for a thin, even layer of chocolate:
- Avoid double-dipping the balls unless necessary.
- If too much chocolate accumulates on the bottom, tap the fork gently against the bowl to shake off excess before transferring the balls to a tray.
Serving Suggestions
Once your peanut butter balls are ready, it’s time to serve and enjoy them. Here are some creative and practical serving ideas:
- Best Occasions to Serve Peanut Butter Balls:
- Holiday parties, potlucks, or gatherings where finger foods are appreciated.
- As a quick snack for kids or a post-workout energy boost.
- Gift them as homemade treats for friends, family, or coworkers.
- Pairing Ideas: Pair these sweet treats with complementary flavors, such as:
- Coffee, tea, or hot chocolate for an afternoon snack.
- Fresh fruit like strawberries or apple slices for a healthier option.
These serving ideas make peanut butter balls versatile and suitable for various occasions and audiences.
Storing the Peanut Butter Balls
Proper storage ensures that your peanut butter balls remain fresh, tasty, and ready to enjoy whenever you like.
- Short-Term Storage:
- Place the peanut butter balls in an airtight container. Use parchment paper between layers to prevent them from sticking together.
- Store in the refrigerator for up to 7–10 days. Chilling them keeps the chocolate firm and the peanut butter fresh.
- Freezing for Long-Term Storage:
- If you’d like to keep the peanut butter balls for longer, freezing is a great option.
- Place the balls on a baking sheet lined with parchment paper and freeze them for 1–2 hours. Once frozen, transfer them to a freezer-safe container or resealable bag. Label the container with the date.
- Peanut butter balls can be frozen for up to 3 months. Simply thaw them in the refrigerator for a few hours before serving.
Pro Tip: To prevent freezer burn, wrap the peanut butter balls individually in plastic wrap before placing them in a container.
H2: Nutritional Information
Understanding the nutritional breakdown of peanut butter balls with Rice Krispies is important, especially for those monitoring their diet or looking for a balanced snack option. These delicious treats provide a good source of energy due to their combination of protein, healthy fats, and carbohydrates.
Calorie Breakdown per Ball
The nutritional content can vary depending on the type and quantity of ingredients used, but here’s a general estimate for one standard-sized peanut butter ball:
- Calories: Approximately 100–150 calories per ball.
- Protein: Around 3–5 grams, depending on the peanut butter used.
- Fats: 6–8 grams, primarily from peanut butter (healthy unsaturated fats).
- Carbohydrates: 10–15 grams, including sugar from the chocolate coating or sweetener.
This makes peanut butter balls an ideal snack for a quick energy boost, particularly before or after workouts. They offer a good mix of macronutrients that can help sustain energy levels.
Insights on Protein, Fats, and Carbs
- Protein: Peanut butter is a great source of plant-based protein, which supports muscle repair and growth. This is why peanut butter balls are a popular choice among fitness enthusiasts and bodybuilders.
- Healthy Fats: The unsaturated fats in peanut butter contribute to heart health and satiety, keeping you fuller for longer.
- Carbohydrates: Rice Krispies provide a quick source of carbs that fuel energy levels. The chocolate coating or sweetener adds sugar, which can be moderated based on personal preference.
Healthier Ingredient Swaps to Lower Calories or Sugar
If you’re looking to make this recipe healthier, consider these simple swaps:
- Use Natural Peanut Butter: Opt for peanut butter with no added sugar or oils to reduce unnecessary calories.
- Choose Dark Chocolate: Dark chocolate contains less sugar and offers antioxidants, making it a healthier coating option.
- Reduce Sweeteners: If you’re using honey or maple syrup, cut back slightly or substitute with sugar-free alternatives like stevia or monk fruit syrup.
- Add Nutrient Boosters: Incorporate ingredients like chia seeds, ground flaxseeds, or a sprinkle of protein powder to enhance the nutritional value.
Why Bodybuilders Love Rice Krispies Treats
Many bodybuilders and athletes include Rice Krispies in their pre-workout or post-workout meals. This is because Rice Krispies cereal is a fast-digesting carbohydrate that provides quick energy without overwhelming the digestive system. Combined with peanut butter (protein and fat), these balls offer a balanced energy source that helps fuel workouts and recovery.
H2: Conclusion
In conclusion, 3-ingredient peanut butter balls with Rice Krispies are the ultimate treat for anyone looking for a simple, delicious, and versatile snack. They are beginner-friendly, require minimal time and effort, and can be adapted to suit a variety of dietary needs and preferences. Whether you’re preparing them for a special occasion, as a post-workout snack, or as a fun treat for the family, these peanut butter balls never disappoint.
With their rich, nutty flavor and light, crispy texture, they’re sure to become a staple recipe in your kitchen. Plus, their flexibility allows you to experiment with flavors, coatings, and nutritional tweaks to match your taste and lifestyle.
Finally, by following the tips shared for preparation, troubleshooting, and storage, you can ensure perfect peanut butter balls every time. Enjoy these tasty bites of goodness and share them with loved ones—they’re guaranteed to be a hit!
FAQ Section
What can I use instead of marshmallows in Rice Krispies?
If you want to make Rice Krispies treats without marshmallows, you can use alternatives like honey, maple syrup, or peanut butter. These ingredients act as a natural binding agent and add sweetness to the recipe. For a vegan option, use agave syrup or brown rice syrup instead.
Why do so many bodybuilders eat Rice Krispies?
Bodybuilders often eat Rice Krispies because they are fast-digesting carbohydrates. Rice Krispies provide quick energy without causing digestive discomfort, making them ideal for pre-workout snacks. Paired with peanut butter, they offer a combination of carbs and protein to fuel workouts and recovery efficiently.
Why are my peanut butter balls sticky?
Peanut butter balls can become sticky if:
The peanut butter mixture is too warm or has too much sweetener. To fix this, chill the mixture in the refrigerator for 10–15 minutes before rolling.
The peanut butter is too runny. Use a thicker, natural peanut butter for better consistency.
To prevent sticking while rolling, lightly coat your hands with oil or cooking spray.
When can babies have Rice Krispies?
Babies can have Rice Krispies cereal around 8–12 months of age, depending on their chewing abilities. It’s important to ensure the cereal is softened with milk or water to prevent choking. However, always consult with a pediatrician before introducing new foods to your baby’s diet, especially those containing added sugar or small, crunchy textures.
