
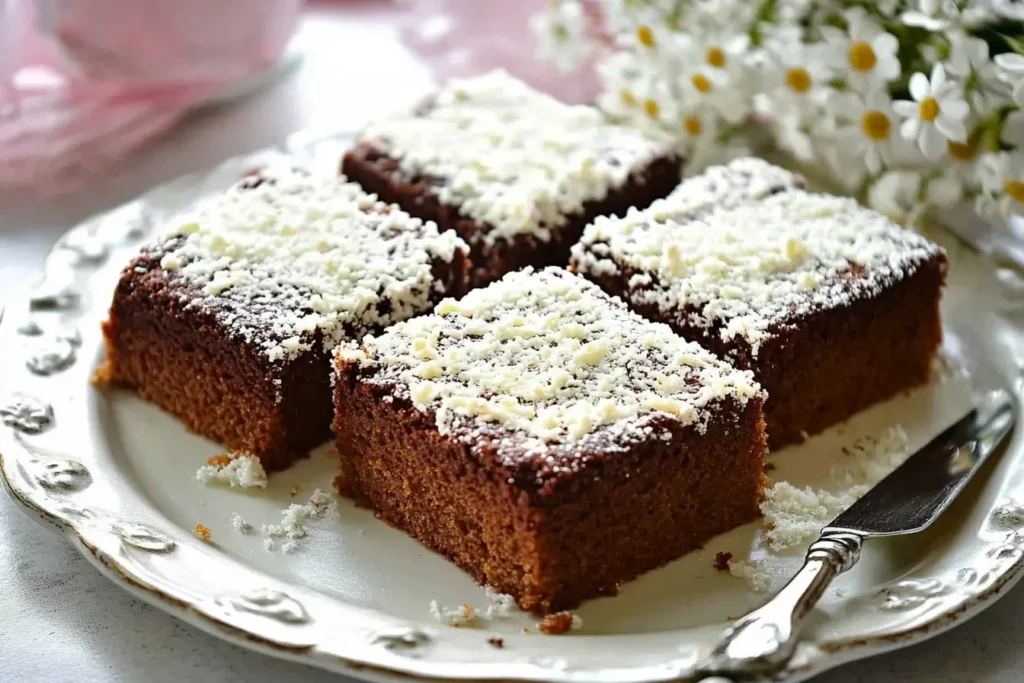
What is a Kefir Sheet Cake?
Kefir sheet cake is a simple yet delightful dessert known for its moist texture and tangy flavor. This dessert combines the health benefits of kefir, a fermented dairy product, with the versatility of a sheet cake that’s perfect for any occasion. The origins of kefir sheet cake can be traced to regions where kefir is a staple, particularly in Eastern Europe and the Middle East. The cake’s popularity has since spread globally, with bakers embracing its unique taste and texture.
Defining Kefir Sheet Cake
At its core, kefir sheet cake is a one-pan baked treat that balances the tanginess of kefir with the sweetness of traditional cake ingredients. Kefir’s acidity reacts with baking agents like baking soda or baking powder, creating a soft, tender crumb. This makes it an excellent choice for those looking for a cake that’s easy to prepare yet feels luxurious.
The History of Kefir in Baking
Kefir has been a key ingredient in baking for centuries in cultures where fermentation plays a significant culinary role. Originating in the Caucasus Mountains, kefir became a popular dairy product due to its nutritional profile and probiotic content. Over time, its use expanded from drinks to baked goods, providing a unique depth of flavor and texture to recipes like bread, pancakes, and, of course, cakes.
The Science Behind Kefir
The secret to kefir’s success in baking lies in its acidity and probiotics. The acidity interacts with leavening agents, producing carbon dioxide and enhancing the cake’s rise. This reaction not only creates a lighter texture but also intensifies the cake’s tangy undertones. Additionally, kefir’s natural probiotics support gut health, making it a functional ingredient for health-conscious bakers.
Why Use Kefir in Baking?
Baking with kefir offers a unique combination of flavor, texture, and health benefits that make it an excellent choice for both novice and experienced bakers. Its versatility and nutritional value elevate it above standard baking ingredients like buttermilk or yogurt, ensuring consistently moist and delicious results.
Nutritional Benefits of Kefir
Kefir is more than just a flavorful ingredient; it’s a powerhouse of nutrients. Rich in probiotics, kefir promotes gut health, improves digestion, and supports immunity. It’s also a great source of calcium, vitamin D, and protein, which makes it a nutritious addition to baked goods. By incorporating kefir into your cake recipes, you’re creating a dessert that doesn’t just satisfy your sweet tooth but also contributes to your overall well-being.
Kefir vs. Alternatives
When it comes to baking, kefir stands out from its counterparts like buttermilk, yogurt, or milk due to its unique tanginess and texture-enhancing properties. While buttermilk offers acidity, it lacks the probiotic richness of kefir. Similarly, yogurt provides creaminess but doesn’t replicate the same light, airy crumb that kefir imparts. For those seeking a healthier yet flavorful alternative, kefir is the ideal choice.
Key Ingredients and Their Roles
The key ingredients in a kefir sheet cake include flour, sugar, eggs, fats, and, of course, kefir. Each ingredient plays a vital role:
- Flour provides the structure for the cake.
- Sugar sweetens and helps create a golden crust.
- Eggs act as a binder and contribute to the cake’s richness.
- Fats, such as butter or oil, add moisture and tenderness.
- Kefir ensures a tangy flavor while working with baking agents to produce a soft, fluffy crumb.
Flavor Additions
Kefir sheet cakes are highly adaptable, allowing bakers to experiment with flavor additions. Classic options include vanilla and citrus zest, which complement kefir’s tanginess. For a more indulgent twist, consider adding cocoa powder or chocolate chips. Spices like cinnamon and nutmeg can also add warmth and complexity, making the cake suitable for various occasions, from summer picnics to holiday gatherings.
Substitutions for Dietary Needs
One of the benefits of kefir is its adaptability for dietary preferences. Gluten-free bakers can substitute regular flour with gluten-free blends, while vegans can opt for non-dairy kefir made from almond or coconut milk. These substitutions ensure that kefir sheet cake remains inclusive, catering to diverse needs without compromising taste or texture.
Ingredients Needed for Kefir Sheet Cake
A successful kefir sheet cake relies on a blend of core ingredients that create a balance of flavor, structure, and texture. Each ingredient plays a specific role in ensuring the cake turns out perfectly moist and tangy. Below is a breakdown of these essential components and tips for achieving the best results.
Key Ingredients and Their Roles
The following ingredients are foundational to the recipe:
- Flour: The backbone of any cake, flour provides structure. Use all-purpose flour for the best results, or opt for gluten-free blends if needed.
- Sugar: Not only does sugar sweeten the cake, but it also helps create a tender crumb and a beautifully caramelized crust.
- Kefir: The star of the recipe, kefir adds moisture, acidity, and probiotics. Its tanginess complements the cake’s sweetness, while its acidity interacts with baking agents to ensure a light, airy texture.
- Eggs: Eggs provide richness and act as a binding agent, ensuring the cake holds together while remaining soft.
- Fat (Butter or Oil): Fats contribute to the cake’s moistness. Butter adds a rich, creamy flavor, while oil ensures an ultra-soft texture.
- Leavening Agents (Baking Powder or Baking Soda): These react with kefir’s acidity, helping the cake rise and develop its fluffy structure.
Flavor Additions
To personalize your kefir sheet cake, consider incorporating flavor enhancers:
- Vanilla Extract: A classic addition that deepens the cake’s sweetness.
- Citrus Zest: Lemon, lime, or orange zest can brighten the flavor profile.
- Cocoa Powder: For a chocolate variation, add unsweetened cocoa powder.
- Spices: Warm spices like cinnamon, nutmeg, or cardamom add depth and complexity.
Substitutions for Dietary Needs
Kefir sheet cake can be tailored to suit dietary restrictions:
- Gluten-Free Options: Use gluten-free all-purpose flour blends for a celiac-friendly version.
- Non-Dairy Kefir: Replace traditional dairy kefir with almond, coconut, or soy-based kefir to create a lactose-free or vegan option.
- Sugar Alternatives: Opt for natural sweeteners like coconut sugar, honey, or stevia for a healthier twist.
With the right mix of ingredients and thoughtful substitutions, this cake can be customized for everyone’s tastes and dietary preferences.
Tools and Equipment for Baking
The right tools and equipment can make or break a baking experience, especially when it comes to a delicate recipe like kefir sheet cake. Ensuring you have the proper utensils on hand will streamline the process and lead to consistently great results.
Essential Baking Tools
Before you start, gather the following basic tools:
- Sheet Pan: A high-quality sheet pan is essential for even baking. A standard 9×13-inch pan works well for most sheet cake recipes.
- Mixing Bowls: At least two large mixing bowls are needed—one for dry ingredients and one for wet ingredients. Opt for bowls with non-slip bases for ease of use.
- Spatula: A silicone spatula is perfect for folding and mixing ingredients without overworking the batter.
- Whisk: A whisk is crucial for thoroughly combining dry ingredients and ensuring there are no lumps.
- Electric Mixer (Optional): While not necessary, an electric mixer can make creaming butter and sugar or blending wet ingredients quicker and easier.
Measuring Accurately
Accurate measurements are key to a successful kefir sheet cake. Invest in these tools:
- Measuring Cups and Spoons: Use a set of dry measuring cups for ingredients like flour and sugar and a liquid measuring cup for kefir, oil, or milk.
- Kitchen Scale: For precise measurements, especially when substituting ingredients, a kitchen scale is invaluable.
- Measuring Tools for Liquid: Ensure liquids are measured at eye level to avoid inaccuracies.
Optional Equipment
For a smoother baking process, consider these optional tools:
- Electric Mixer: If you often bake, an electric hand or stand mixer can save time and effort, particularly when blending fats and liquids.
- Offset Spatula: This tool is great for evenly spreading batter in the pan or frosting the finished cake.
- Parchment Paper: Line your sheet pan with parchment to prevent sticking and make cleanup effortless.
Preparing the Oven and Pan
Preparation is critical for a perfectly baked cake:
- Preheat the Oven: Always preheat the oven to the required temperature before placing your cake inside to ensure even baking.
- Grease the Pan: Lightly grease the sheet pan with butter or oil, then dust it with flour or use parchment paper for an easy release.
With the proper tools and setup, you’ll be able to approach the recipe with confidence and ease.
Step-by-Step Recipe for Kefir Sheet Cake
Making a kefir sheet cake is straightforward and rewarding. With simple ingredients and an easy-to-follow process, you can create a moist and flavorful dessert that’s sure to impress. Follow these steps carefully for the best results.
Preparing the Oven and Pan
- Preheat the Oven: Set your oven to 350°F (175°C). Proper preheating ensures the cake bakes evenly and rises well.
- Grease and Line the Pan: Lightly grease your 9×13-inch sheet pan with butter or oil. For easier cleanup and to prevent sticking, line the pan with parchment paper or dust it with a thin layer of flour.
Mixing Dry Ingredients
- In a large mixing bowl, combine the flour, baking powder, baking soda, and a pinch of salt. Whisk these together to ensure the leavening agents are evenly distributed.
- Add any desired spices, such as cinnamon or nutmeg, at this stage to infuse the dry mixture with flavor.
Mixing Wet Ingredients
- In a separate bowl, whisk together the kefir, sugar, eggs, and your choice of fat (melted butter or oil). Ensure the mixture is smooth and well-blended.
- Add vanilla extract or citrus zest, depending on your flavor preference, for an aromatic touch.
Combining Wet and Dry Mixtures
- Gradually fold the wet mixture into the dry ingredients using a silicone spatula or wooden spoon. Avoid overmixing to prevent the cake from becoming dense; mix just until no streaks of flour remain.
- If you’re adding extras like chocolate chips, berries, or nuts, gently fold them in at this stage.
Baking Instructions
- Pour the batter evenly into the prepared sheet pan, spreading it out with an offset spatula if necessary.
- Bake in the preheated oven for 30–35 minutes, or until a toothpick inserted into the center comes out clean.
- Rotate the pan halfway through baking to ensure even cooking, especially if your oven has hot spots.
Cooling and Serving
- Once baked, remove the cake from the oven and let it cool in the pan for about 10 minutes.
- Transfer the cake to a wire rack to cool completely before slicing.
- Serve as is, or dust the top with powdered sugar, glaze, or frosting for added sweetness.
This simple yet comprehensive process ensures a light, tender, and tangy kefir sheet cake that’s perfect for any occasion.
Flavor Variations and Creative Add-Ins for Kefir Sheet Cake
One of the most appealing aspects of a kefir sheet cake is its versatility. While the classic recipe delivers a deliciously tangy and moist cake, experimenting with flavor variations and add-ins allows you to create unique versions for different occasions or preferences. Here are some creative ideas to customize your kefir sheet cake.
Chocolate Variation
For chocolate lovers, transforming your kefir sheet cake into a rich, chocolatey dessert is simple:
- Add Cocoa Powder: Replace ¼ cup of the flour with unsweetened cocoa powder to infuse the cake with a deep chocolate flavor.
- Incorporate Chocolate Chips: Mix semi-sweet or dark chocolate chips into the batter for bursts of molten chocolate in every bite.
- Top with Ganache: After baking, drizzle the cake with a silky chocolate ganache made from heavy cream and melted chocolate for an indulgent finish.
Citrus Zest Options
Citrus flavors pair beautifully with kefir’s tanginess, creating a light and refreshing cake:
- Lemon or Orange Zest: Add 1–2 teaspoons of freshly grated lemon or orange zest to the batter for a bright, citrusy aroma.
- Citrus Glaze: Mix powdered sugar with freshly squeezed lemon or orange juice and drizzle it over the cooled cake for a zesty topping.
- Garnish: Sprinkle the top with candied citrus peel for an elegant touch.
Seasonal Additions
Celebrate the flavors of each season by incorporating fresh, seasonal ingredients:
- Summer Fruits: Fold in chopped berries such as strawberries, blueberries, or raspberries for a burst of fruity flavor.
- Autumn Touch: Add pumpkin puree and warm spices like cinnamon, nutmeg, and cloves for a fall-inspired cake.
- Winter Twist: Use dried fruits like cranberries and a hint of orange zest to capture holiday flavors.
Healthier Options
If you’re looking for a more health-conscious version, these alternatives can reduce sugar and calories without sacrificing taste:
- Natural Sweeteners: Replace refined sugar with honey, maple syrup, or coconut sugar.
- Whole Wheat Flour: Substitute part of the all-purpose flour with whole wheat flour for added fiber and nutrients.
- Alternative Sweeteners: Use a sugar-free sweetener like stevia or erythritol for a diabetic-friendly version.
Creative Garnishes
The way you finish your cake can transform its presentation and taste:
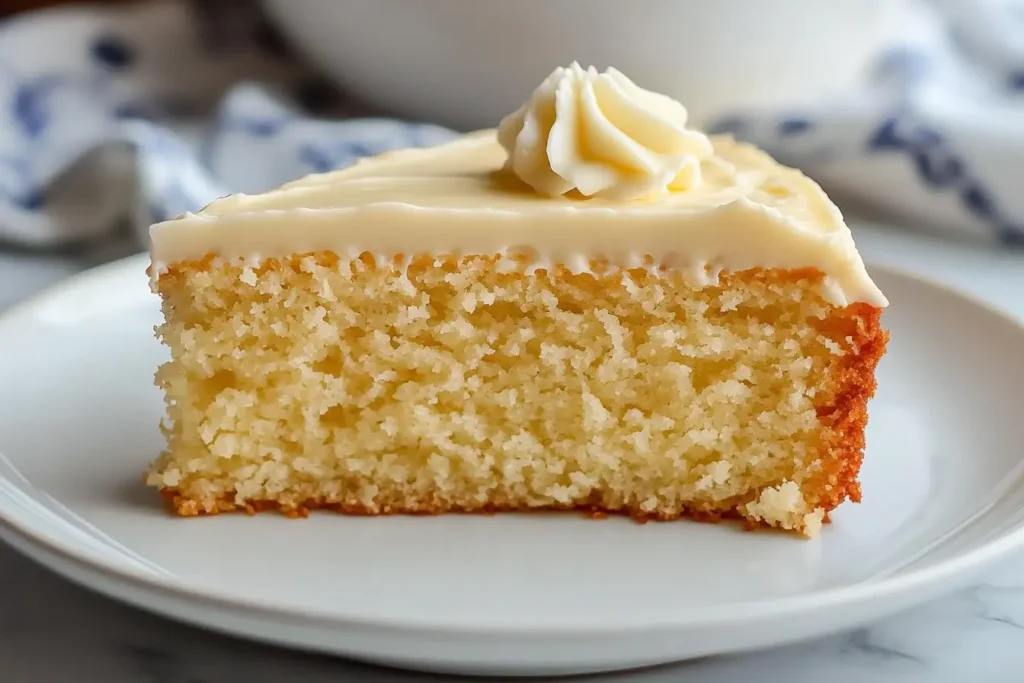
- Frosting Variations: Try cream cheese frosting for a tangy complement, or go for a lighter whipped cream topping.
- Toppings: Sprinkle chopped nuts, shredded coconut, or edible flowers for visual appeal and texture.
- Layering Options: Slice the sheet cake in half and layer it with jam, fruit preserves, or flavored buttercream for a sophisticated dessert.
By experimenting with these add-ins and garnishes, you can create a range of kefir sheet cakes that cater to different tastes, seasons, and occasions.
Common Mistakes and Troubleshooting Tips
While kefir sheet cake is relatively easy to prepare, a few common pitfalls can affect the texture, flavor, or appearance of the final product. Understanding these mistakes and how to avoid them will ensure a consistently perfect cake.

Why is My Cake Dense?
A dense cake is often the result of overmixing the batter or incorrect measurements. Here’s how to prevent this issue:
- Avoid Overmixing: Mix the wet and dry ingredients just until combined. Overmixing develops gluten, which can lead to a dense and chewy texture.
- Check Leavening Agents: Ensure your baking powder and baking soda are fresh. Expired leavening agents won’t create the necessary rise.
- Measure Ingredients Properly: Too much flour can weigh down the batter. Use the spoon-and-level method when measuring flour to avoid packing it into the measuring cup.
How to Prevent Dry Cake
A dry cake can result from incorrect baking time or an imbalance in wet and dry ingredients. Follow these tips to maintain the cake’s moist texture:
- Don’t Overbake: Check the cake for doneness 5 minutes before the suggested baking time ends. Insert a toothpick into the center—if it comes out clean, the cake is ready.
- Balance Ingredients: Ensure the ratio of wet (kefir, eggs, oil) to dry ingredients is correct. Too much flour or not enough fat can dry out the cake.
- Store Properly: If not serving immediately, wrap the cooled cake tightly in plastic wrap to retain moisture.
Uneven Texture Issues
Uneven texture, such as lumpy batter or inconsistent rise, can be caused by poor mixing or oven temperature inconsistencies. Here’s how to fix it:
- Sift Dry Ingredients: Sifting the flour and leavening agents ensures they mix evenly and prevents lumps.
- Room Temperature Ingredients: Ensure eggs, kefir, and other wet ingredients are at room temperature. Cold ingredients can cause uneven mixing.
- Calibrate Your Oven: Use an oven thermometer to confirm the temperature matches the setting. Uneven heat can lead to poorly risen cakes.
Baking Tips for Consistency
To achieve a consistently perfect cake, keep these general tips in mind:
- Preheat the Oven: Always preheat your oven for at least 15 minutes before baking.
- Don’t Open the Oven Door: Avoid opening the door during baking, as this can cause the temperature to drop and the cake to deflate.
- Use the Right Pan: A 9×13-inch sheet pan with light-colored metal ensures even heat distribution. Darker pans can absorb too much heat, causing the edges to overcook.
Salvaging Mistakes
If your cake doesn’t turn out as expected, you can still salvage it:
- For Dry Cake: Brush the surface with a simple syrup or a mix of kefir and sugar to add moisture.
- For Dense Cake: Slice it thinly and layer with whipped cream or frosting to mask the texture.
- For Overbaked Edges: Trim the edges and use the remaining cake for trifles or cake pops.
By addressing these common issues, you can refine your technique and ensure your kefir sheet cake turns out perfectly every time.
Storing and Reheating Tips for Kefir Sheet Cake
Proper storage and reheating techniques are essential to maintain the freshness and flavor of your kefir sheet cake. Whether you plan to enjoy it over several days or prepare it ahead of time, these tips will ensure your cake remains moist and delicious.
Best Ways to Store Kefir Sheet Cake
- Room Temperature Storage: If you plan to consume the cake within a day or two, store it at room temperature.
- How to Store: Cover the cake tightly with plastic wrap or aluminum foil to prevent it from drying out.
- Duration: It can remain fresh at room temperature for up to 48 hours, provided it is stored in a cool, dry place away from sunlight.
- Refrigeration: For longer storage, refrigerate the cake.
- How to Store: Place the cake in an airtight container or wrap it tightly in plastic wrap to retain moisture.
- Duration: The cake can stay fresh in the refrigerator for up to 5–7 days.
- Freezing: If you need to store the cake for an extended period, freezing is the best option.
- How to Store: Wrap individual slices or the entire cake in plastic wrap, then place it in a freezer-safe ziplock bag or airtight container.
- Duration: The cake can be frozen for up to 3 months. Label the container with the date for reference.
Reheating for Freshness
Reheating a stored kefir sheet cake restores its softness and enhances the flavor. Here’s how to reheat it correctly:
- Microwave Method:
- Place a slice on a microwave-safe plate.
- Cover it with a damp paper towel to prevent it from drying out.
- Heat on medium power for 10–15 seconds, checking to ensure it doesn’t overheat.
- Oven Method:
- Preheat the oven to 300°F (150°C).
- Wrap the cake (or slices) in aluminum foil to lock in moisture.
- Warm in the oven for 10–15 minutes, depending on the size of the portion.
- Toaster Oven: For smaller portions, a toaster oven works well. Wrap the cake in foil and heat it for 5–10 minutes at low heat.
Maintaining Texture and Flavor
- Avoid Overheating: Reheating for too long or at too high a temperature can dry out the cake. Always use gentle heat.
- Add Moisture: If the cake feels dry after storage, brush it lightly with a sugar syrup or a mixture of kefir and sugar before reheating.
- Frosting Considerations: If the cake is frosted, consider reheating it without the frosting. Remove or scrape off the frosting, reheat the cake, and then reapply fresh frosting if desired.
By following these storage and reheating tips, you can enjoy your kefir sheet cake at its best—whether it’s freshly baked or saved for later.
Kefir Sheet Cake Nutritional Highlights
Kefir sheet cake is not only a delicious dessert but also a treat that offers surprising nutritional benefits. Thanks to the inclusion of kefir and the potential for healthy substitutions, this cake can be a relatively guilt-free indulgence. Let’s explore the nutritional aspects and how to make it even healthier.
Caloric Breakdown per Slice
The calorie count of a standard slice of kefir sheet cake will depend on the ingredients and portion size. Here’s a general estimate for a classic recipe:
- Calories: Around 200–250 per slice (based on a 12-slice pan).
- Carbohydrates: Approximately 30–35 grams.
- Fats: About 8–10 grams, depending on the type and amount of fat used (butter or oil).
- Protein: 4–6 grams, boosted by the kefir and eggs.
This breakdown makes kefir sheet cake a relatively moderate dessert option compared to richer alternatives like frosted layer cakes or cheesecakes.
Kefir’s Contribution to Gut Health
The star ingredient in this cake, kefir, is a fermented dairy product loaded with probiotics. These beneficial bacteria support gut health, improve digestion, and enhance nutrient absorption. Other nutritional highlights of kefir include:
- Calcium and Vitamin D: Essential for strong bones and teeth.
- Protein: Contributes to muscle repair and overall satiety.
- Low Lactose Levels: Kefir is more digestible than regular milk, making it suitable for individuals with mild lactose intolerance.
By incorporating kefir into the recipe, the cake not only satisfies your sweet tooth but also provides a dose of functional nutrition.
Adjusting the Recipe for Dietary Goals
For those with specific dietary preferences or restrictions, the recipe can be easily adjusted to make it healthier:
- Lower Sugar Content: Reduce the sugar by up to 25% or use natural sweeteners like honey or coconut sugar.
- Increase Fiber: Substitute part of the all-purpose flour with whole wheat or oat flour to boost the fiber content.
- Healthy Fats: Replace butter with healthier fats like avocado oil or coconut oil.
- Low-Calorie Option: Use non-fat or low-fat kefir instead of full-fat kefir.
These adjustments make the cake suitable for a variety of dietary goals, from weight management to better gut health.
How Kefir Enhances After Baking
Unlike some desserts that lose their nutritional value after baking, kefir retains many of its benefits during the baking process:
- Acidity in Kefir: Helps activate baking agents for a fluffier cake while maintaining its tangy flavor.
- Probiotic Residues: While live probiotics don’t survive high baking temperatures, the cake still benefits from kefir’s protein, calcium, and vitamin content.
- Low Glycemic Impact: The balance of healthy fats, protein, and fiber (if added) helps moderate the cake’s glycemic index, preventing drastic sugar spikes.
Tips for Experimentation
To further enhance the cake’s nutritional profile, consider these ideas:
- Add chia seeds, flaxseeds, or ground nuts to the batter for a boost of omega-3s and fiber.
- Incorporate fresh fruit, like blueberries or apples, to add natural sweetness and additional nutrients.
- Serve with a dollop of Greek yogurt or a kefir-based glaze for an extra dose of protein.
By focusing on these nutritional highlights and modifications, you can enjoy kefir sheet cake as both a treat and a functional food that contributes to your overall health.
FAQs About Kefir Sheet Cake
To address common queries and provide additional clarity, here are answers to some frequently asked questions about kefir sheet cake. These insights can help both beginners and experienced bakers get the most out of their baking experience.
Can I Use Flavored Kefir for This Recipe?
Yes, flavored kefir can be used to enhance the taste of your cake. Popular options include vanilla, strawberry, or blueberry-flavored kefir. However, keep in mind that flavored kefir often contains added sugars, so you may need to reduce the sugar in the recipe to avoid an overly sweet cake.
What Can I Use as a Substitute for Kefir?
If you don’t have kefir on hand, here are a few substitutes:
- Buttermilk: Offers a similar tanginess and acidity, though it lacks probiotics.
- Plain Yogurt: Mix with a small amount of water or milk to mimic kefir’s thinner consistency.
- Non-Dairy Kefir: Almond, coconut, or soy-based kefir works for lactose-intolerant or vegan individuals.
- Homemade Kefir: If you have kefir grains, you can make your own kefir to use in the recipe.
Why Did My Cake Turn Out Flat?
A flat cake can result from a few common mistakes:
- Inactive Leavening Agents: Ensure your baking powder or baking soda is fresh. Test their effectiveness by adding a small amount to vinegar (for soda) or hot water (for powder)—if they don’t fizz, replace them.
- Incorrect Oven Temperature: Use an oven thermometer to ensure the oven is preheated to the correct temperature.
- Overmixing: Mixing the batter too vigorously can deflate the air bubbles needed for a fluffy cake.
How Do I Know When the Cake is Done?
The cake is ready when:
- A toothpick inserted into the center comes out clean or with a few moist crumbs.
- The edges pull away slightly from the sides of the pan.
- The top feels firm but springs back when gently pressed.
Avoid overbaking, as it can lead to a dry texture.
Can I Make This Cake Ahead of Time?
Absolutely! Kefir sheet cake can be made ahead for convenience:
- Storage: Bake the cake, allow it to cool completely, then wrap it tightly in plastic wrap. Store at room temperature for up to two days, in the refrigerator for up to a week, or freeze for up to three months.
- Reheating: Follow the reheating instructions to restore its moist texture and enhance the flavors before serving.
Can I Double the Recipe?
Yes, the recipe can be doubled to accommodate larger gatherings. Use a larger sheet pan or divide the batter evenly between two pans. Keep an eye on the baking time, as it may vary slightly based on the size and depth of the batter.
How Do I Frost or Glaze the Cake?
For a simple glaze:
- Mix powdered sugar with a few tablespoons of milk or kefir and drizzle it over the cooled cake. For frosting:
- Cream cheese frosting pairs beautifully with the tanginess of kefir. Beat softened cream cheese with powdered sugar and vanilla extract until smooth, then spread evenly over the cake.
With these FAQs answered, you’ll be better prepared to bake a perfect kefir sheet cake every time.